

That frustrating moment when your horn stops working in traffic - our step-by-step guide ensures proper installation for reliable performance when you need it most.
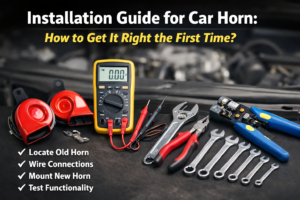
You'll need basic tools (wrenches, wire strippers, multimeter) and about 30-60 minutes to properly install a car horn, following these key steps: locating the old horn, wiring connections, mounting the new unit, and testing functionality.
Tools and Materials Needed for Installation
Having the right equipment before starting prevents interruptions and ensures a professional-quality installation.
Essential items:
- 10mm & 12mm wrenches
- Wire strippers/crimpers
- Multimeter (for testing)
- Electrical tape or heat shrink
- Mounting brackets (if needed)
- Safety gloves and glasses

Installation Toolkit Checklist
| Tool Category | Specific Items | Purpose | Alternative Options |
|---|---|---|---|
| Basic Tools | Adjustable wrench, screwdrivers | Access and mounting | Socket set |
| Electrical | Wire strippers, crimping tool | Connection work | Scissors (carefully) |
| Testing | Multimeter, test light | Verification | Battery/bulb tester |
| Safety | Gloves, eye protection | Injury prevention | Work gloves |
| Consumables | Electrical tape, zip ties | Securing wires | Heat shrink tubing |
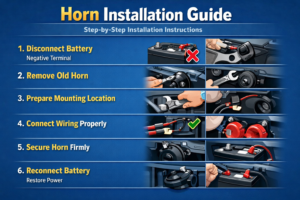
Step-by-Step Installation Instructions
Follow these systematic steps to ensure correct and safe horn installation in any vehicle.
Core installation phases:
- Disconnect battery negative terminal
- Locate and remove old horn
- Prepare mounting location
- Connect wiring properly
- Secure horn firmly
- Reconnect battery
Detailed Installation Process
| Step | Action | Key Points | Time Estimate | Safety Note |
|---|---|---|---|---|
| 1 | Battery Disconnect | Negative terminal first | 2 minutes | Prevent shorts |
| 2 | Old Horn Removal | Note wire colors/positions | 5-10 minutes | Take photos |
| 3 | Surface Prep | Clean mounting area | 3-5 minutes | Remove rust |
| 4 | New Horn Mount | Use existing or new bracket | 5-15 minutes | Avoid metal contact |
| 5 | Wiring | Match colors, secure connections | 10 minutes | Waterproof joints |
| 6 | Battery Reconnect | Positive terminal first | 2 minutes | Check polarity |
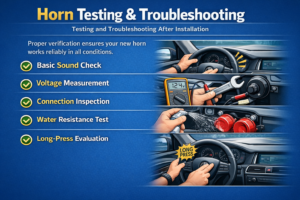
Testing and Troubleshooting After Installation
Proper verification ensures your new horn works reliably in all conditions.
Testing procedure:
- Basic sound check
- Voltage measurement
- Connection inspection
- Water resistance test
- Long-press evaluation
Common Issues and Solutions
| Problem | Possible Cause | Diagnostic Method | Solution | Prevention |
|---|---|---|---|---|
| No Sound | Power failure | Multimeter test | Check fuses/relay | Proper wiring |
| Weak Sound | Poor ground | Voltage drop test | Clean contacts | Secure mounting |
| Intermittent | Loose connection | Wiggle test | Re-crimp wires | Use connectors |
| Strange Noise | Incorrect mounting | Visual inspection | Add rubber gasket | Follow manual |
| Fuse Blows | Short circuit | Continuity test | Insulate wires | Proper routing |
Conclusion
Proper horn installation requires careful preparation, methodical work, and thorough testing to ensure road-ready performance when you need it most.