
A properly functioning motorcycle horn is critical for rider safety. This comprehensive guide covers five essential testing methods to diagnose any horn issue.
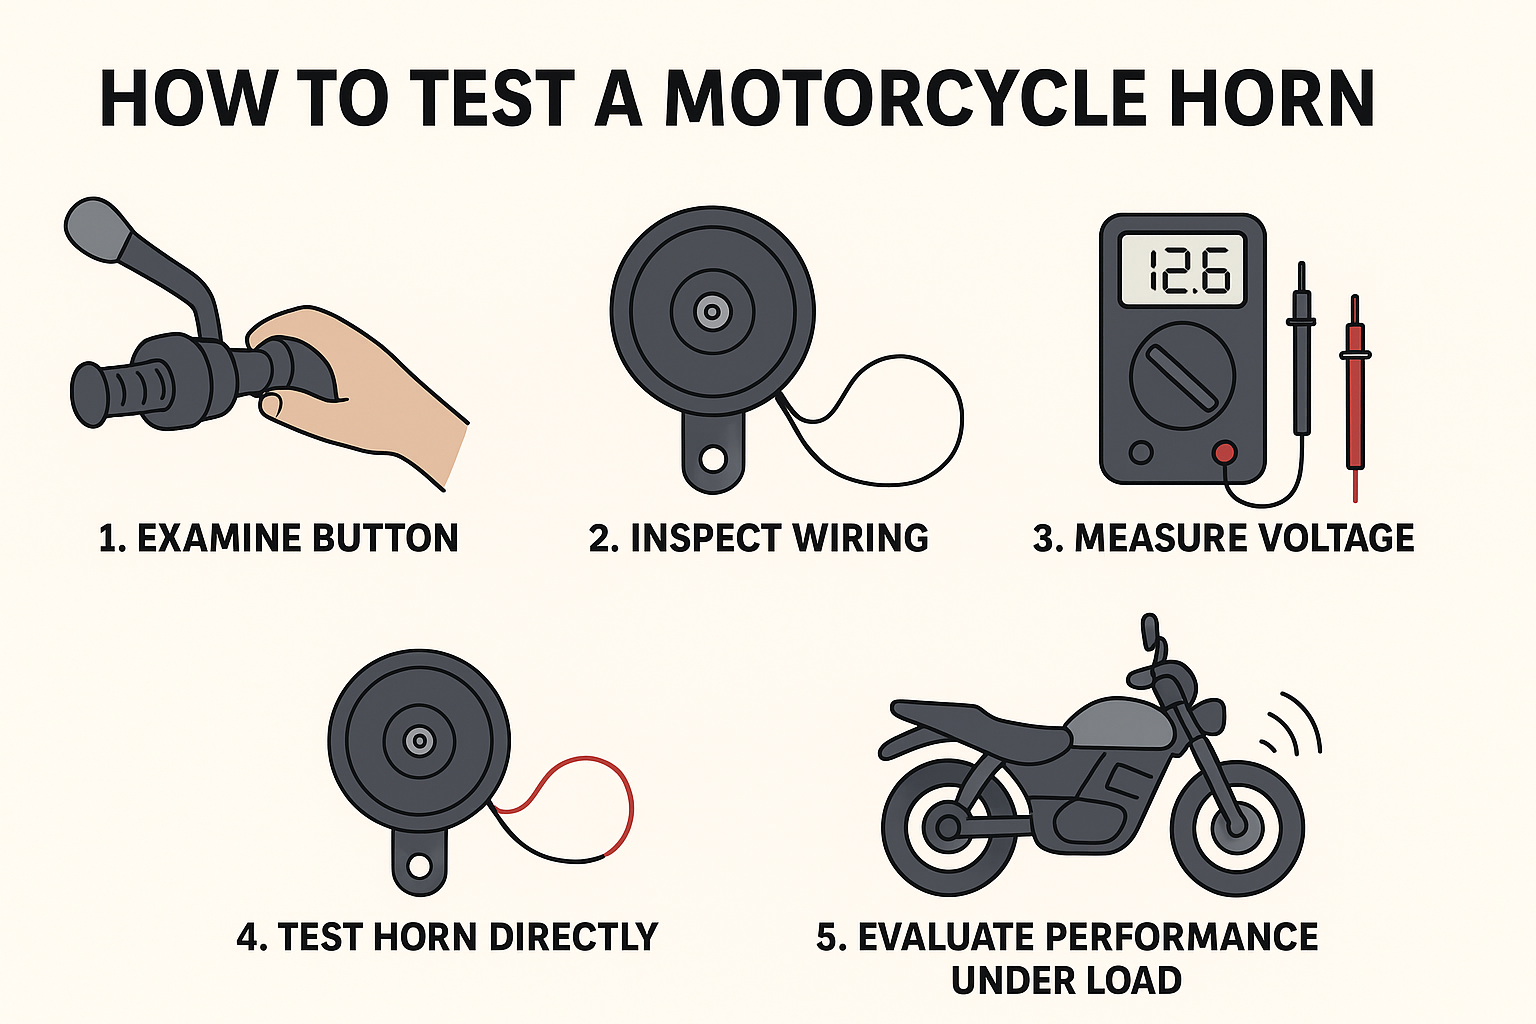
To thoroughly test a motorcycle horn, examine the button, inspect wiring, measure voltage, test the horn directly, and evaluate performance under load - this complete process identifies all potential failure points.
Check the Horn Button Functionality
The horn button is the first component in the circuit and often the source of problems. Start your diagnosis here before moving to other components.
Step-by-step button test:
- Turn ignition ON (engine off)
- Press and hold horn button
- Listen for relay click (indicates circuit activation)
- Check for dashboard warning lights
- Feel button resistance (should be smooth)

Common Horn Button Issues
| Problem | Symptoms | Quick Test | Solution |
|---|---|---|---|
| Worn contacts | Intermittent operation | Multimeter continuity | Clean/replace |
| Broken spring | No resistance | Visual inspection | Replace button |
| Corrosion | Works when wet | Spray test | Clean contacts |
| Loose wiring | Works when wiggled | Movement test | Secure connections |
| Water damage | Works after drying | Dry test | Seal housing |
Prevention tips:
- Apply dielectric grease
- Regular cleaning
- Check mounting screws
- Inspect wiring annually
- Use weatherproof covers
Inspect the Horn Wiring and Connectors
Faulty wiring accounts for nearly half of all horn failures. A careful visual inspection can reveal most wiring problems.
Wiring inspection checklist:
- Follow entire wire path from button to horn
- Check for cracked/damaged insulation
- Examine all connectors for corrosion
- Verify tight terminal connections
- Look for pinched or frayed wires

Wiring Test Results Guide
| Condition | Test Method | Acceptable Range | Action Required |
|---|---|---|---|
| Continuity | Ohm meter | 0-1Ω resistance | Repair if open |
| Insulation | Visual | No cracks/exposure | Replace if damaged |
| Corrosion | Visual | Clean terminals | Clean or replace |
| Connection | Pull test | Secure attachment | Tighten/replace |
| Voltage drop | Load test | <0.5V drop | Repair high resistance |
Critical areas:
- Handlebar flex points
- Near hot engine parts
- Frame contact points
- Connector junctions
- Vibration zones
Measure Voltage at the Horn Terminals
Voltage measurement confirms whether proper power reaches the horn, helping isolate electrical system issues.
Accurate voltage testing:
- Set multimeter to 20V DC scale
- Disconnect horn wiring
- Connect meter to terminals
- Press horn button
- Read voltage (should be 11-14V)

Voltage Test Interpretation
| Reading | Indicates | Next Steps | Common Fixes |
|---|---|---|---|
| 12-14V | Good power | Test horn directly | - |
| 0V | No power | Check relay/fuse | Replace fuse |
| <11V | Weak power | Test battery | Charge battery |
| Intermittent | Wiring issue | Inspect connections | Repair wiring |
| 14V+ | Overvoltage | Check regulator | Replace regulator |
Key measurements:
- Battery voltage (engine off)
- Charging voltage (engine on)
- Voltage drop under load
- Ground connection quality
- Relay operation voltage
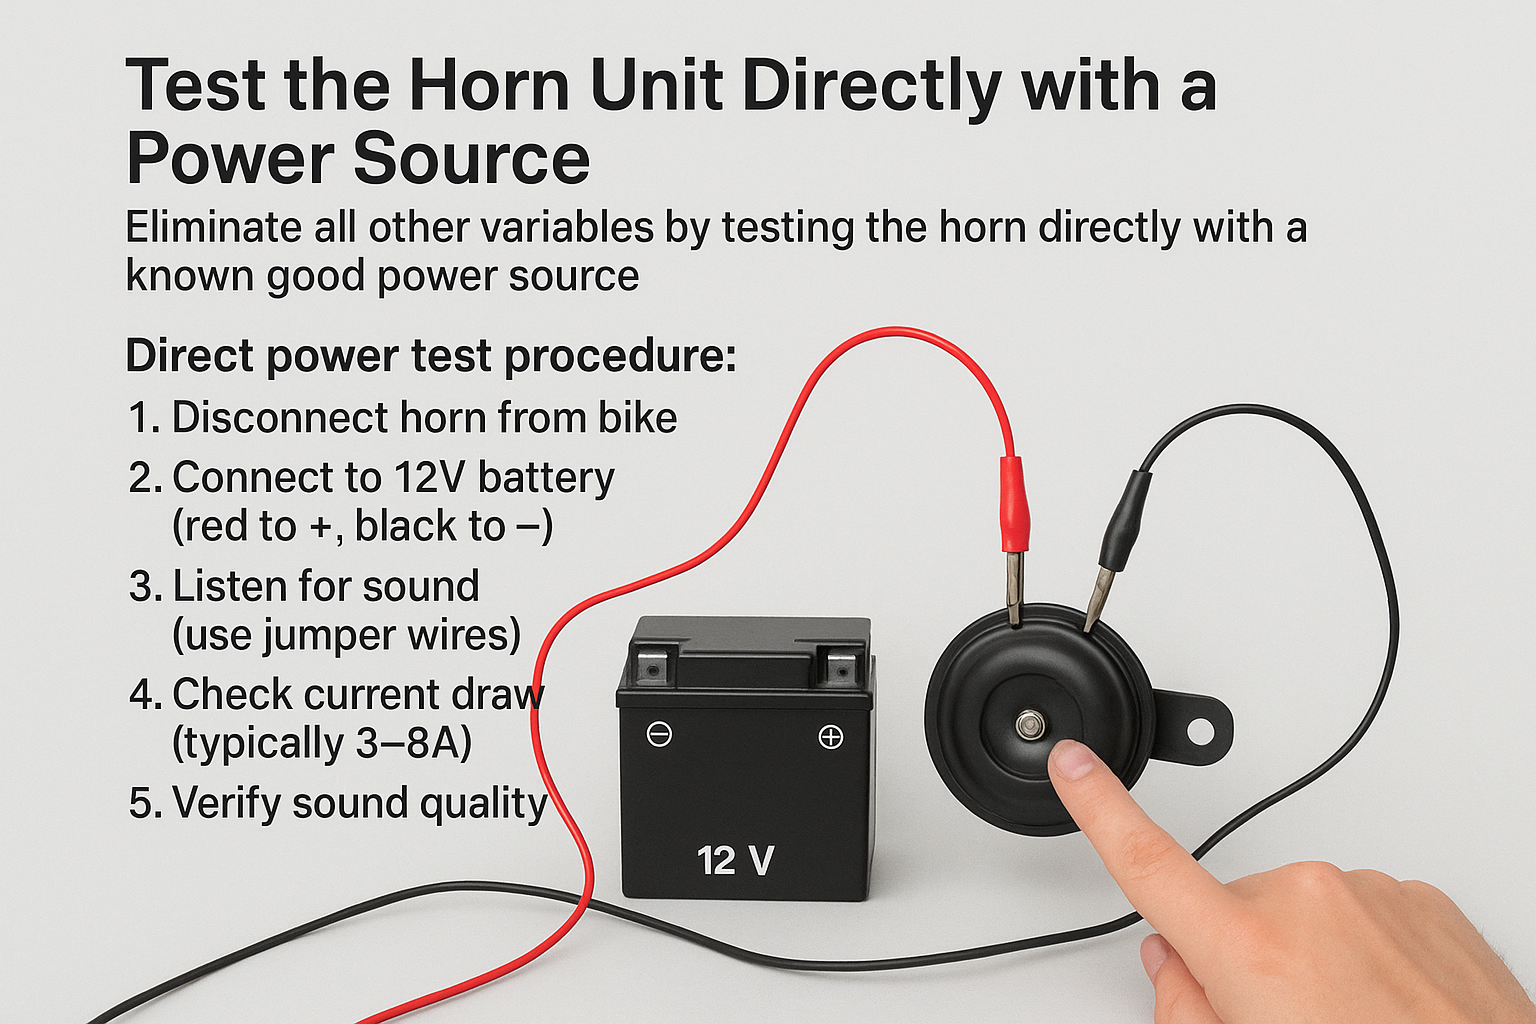
Test the Horn Unit Directly with a Power Source
Eliminate all other variables by testing the horn directly with a known good power source.
Direct power test procedure:
- Disconnect horn from bike
- Connect to 12V battery (red to +, black to -)
- Listen for sound (use jumper wires)
- Check current draw (typically 3-8A)
- Verify sound quality
Horn Unit Test Results
| Result | Diagnosis | Possible Causes | Solutions |
|---|---|---|---|
| Works | Good horn | Other system issue | See other tests |
| No sound | Dead horn | Burnt coil, stuck diaphragm | Replace horn |
| Weak sound | Failing horn | Worn parts, corrosion | Replace horn |
| Intermittent | Internal fault | Loose connections | Replace horn |
| High current | Short circuit | Internal damage | Replace horn |
Testing tips:
- Use fully charged battery
- Check both terminals
- Verify clean connections
- Compare to known good horn
- Measure current draw
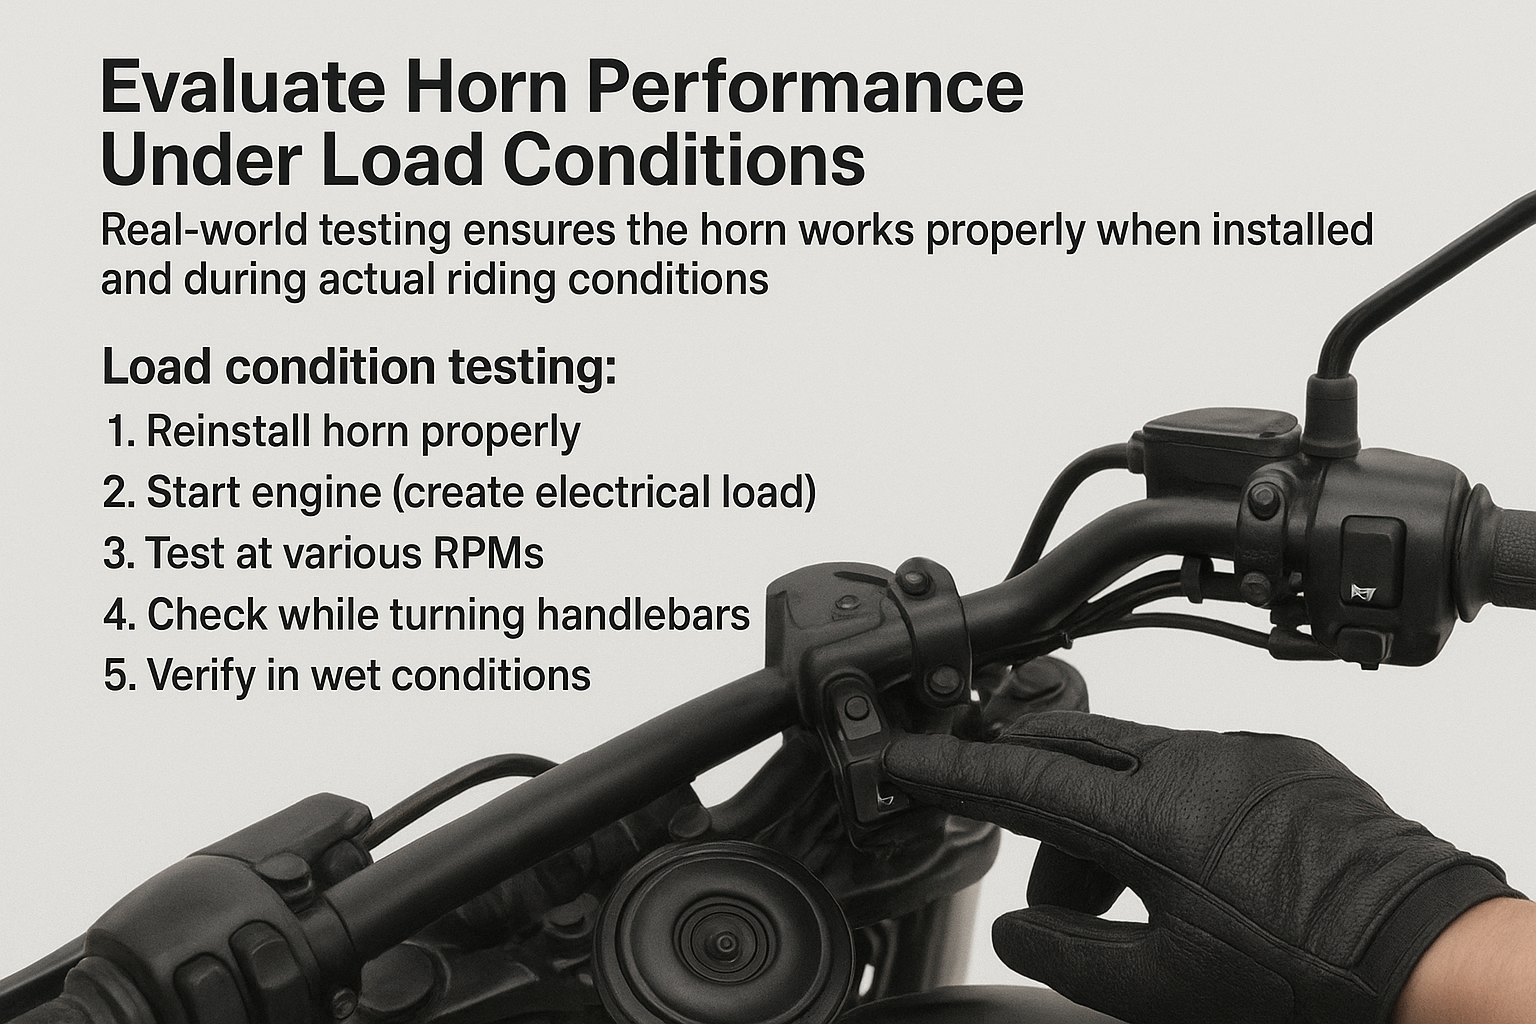
Evaluate Horn Performance Under Load Conditions
Real-world testing ensures the horn works properly when installed and during actual riding conditions.
Load condition testing:
- Reinstall horn properly
- Start engine (create electrical load)
- Test at various RPMs
- Check while turning handlebars
- Verify in wet conditions
Performance Evaluation Criteria
| Condition | Pass Standard | Common Issues | Solutions |
|---|---|---|---|
| Idle | Clear sound at 110dB | Weak sound | Check voltage |
| High RPM | Consistent output | Cutting out | Upgrade wiring |
| Turning | No interruption | Intermittent | Reroute wires |
| Wet | Works when soaked | Short circuit | Better sealing |
| Vibration | No sound change | Loose mount | Secure properly |
Real-world factors:
- Engine vibration
- Electrical load
- Weather exposure
- Handlebar movement
- Road conditions
Conclusion
By following this complete five-step testing process, you can accurately diagnose any motorcycle horn issue and ensure reliable operation when you need it most.