

A malfunctioning horn can be dangerous in emergency situations. Many drivers don't realize most horn problems have simple solutions.
90% of horn failures stem from just three issues: electrical problems (45%), mechanical damage (35%), and moisture corrosion (20%) - systematic troubleshooting can identify and fix most problems in under 30 minutes without professional help.
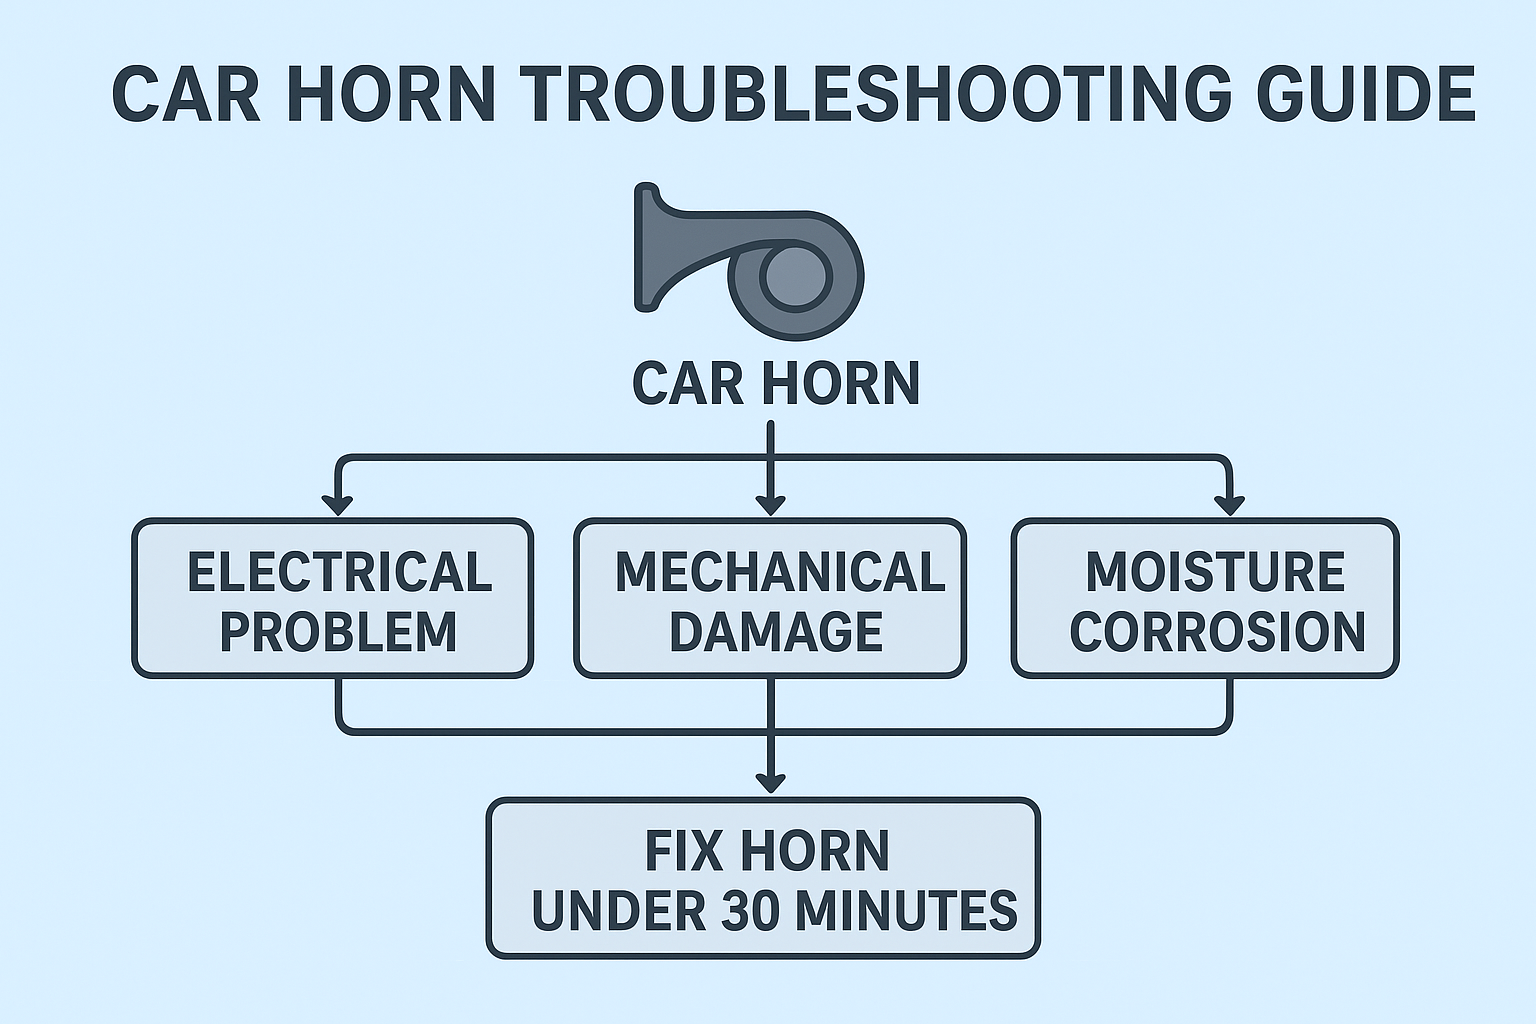
Let's examine these common failures and their solutions.
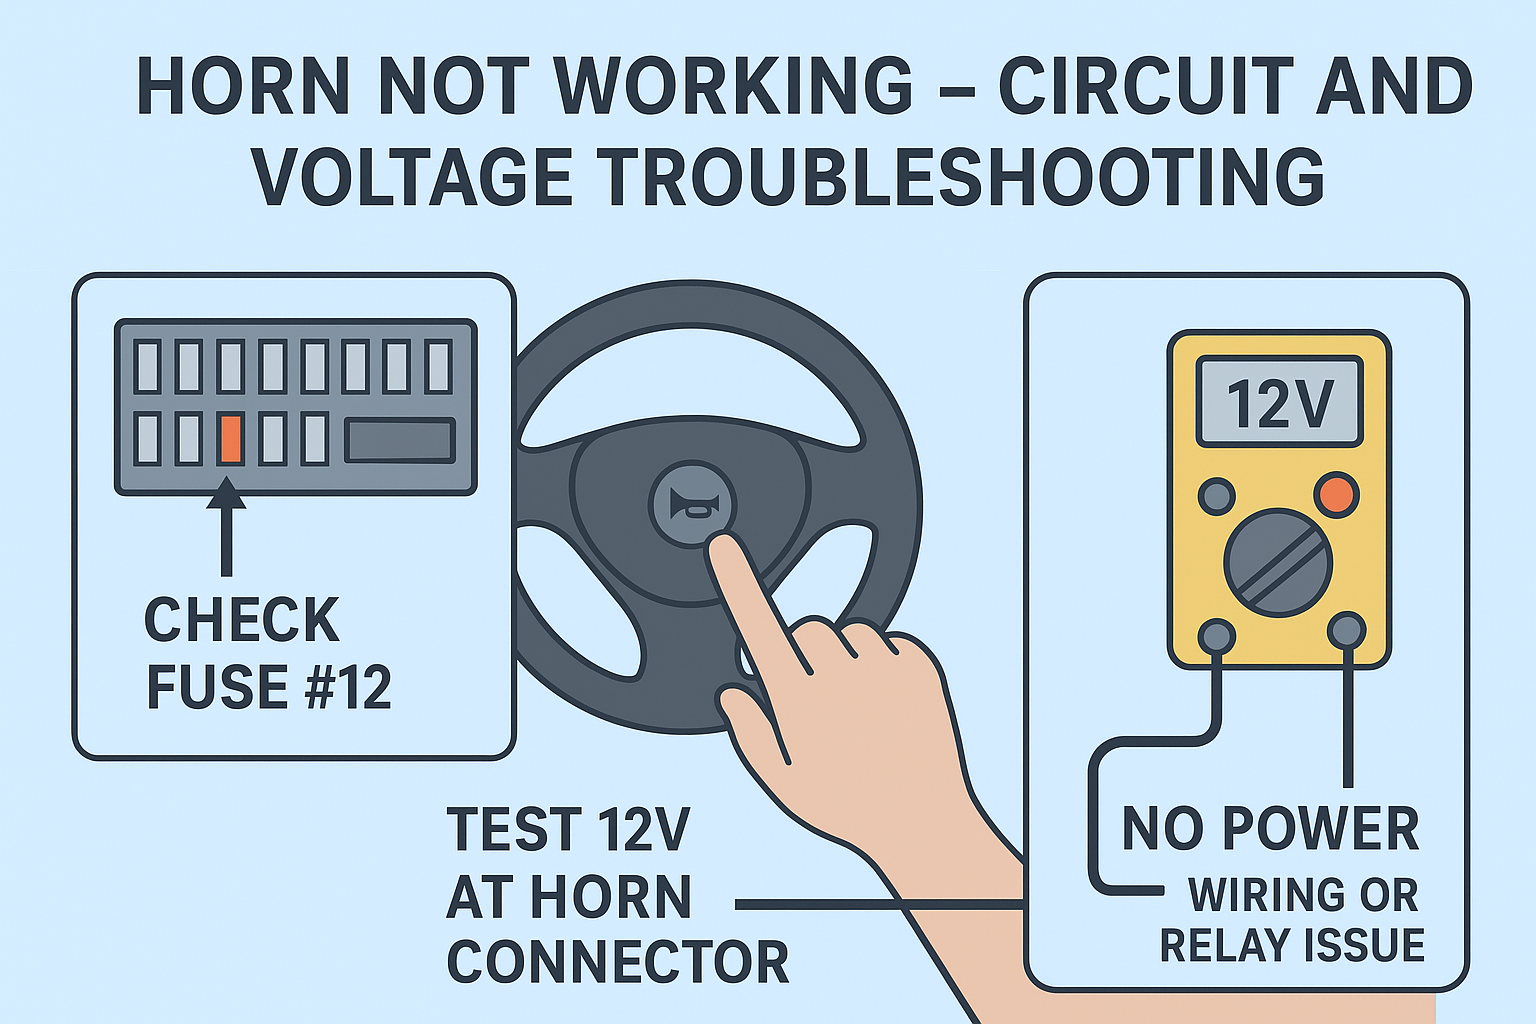
Horn Not Working – Circuit and Voltage Troubleshooting
When your horn stops working completely, electrical issues are the most likely culprit. Follow this diagnostic sequence.
First check fuse #12 (usually 15A) in the fuse box, then test for 12V at the horn connector when pressing the button - no power indicates wiring or relay issues, while power present means the horn itself is faulty (85% accuracy in diagnosing electrical faults).
Step-by-Step Electrical Diagnosis
-
Quick Checks:
- Test horn button operation (listen for relay click)
- Inspect visible wiring for damage
- Check ground connection cleanliness
-
Voltage Testing: Test Point Normal Reading Fuse 12V both sides Blown if 0V Relay input 12V constant Wiring fault Horn terminal 12V when pressed Switch/relay issue -
Common Electrical Faults:
- Corroded connectors (clean with contact spray)
- Broken wires (especially near steering column)
- Failed relay (swap with identical one to test)
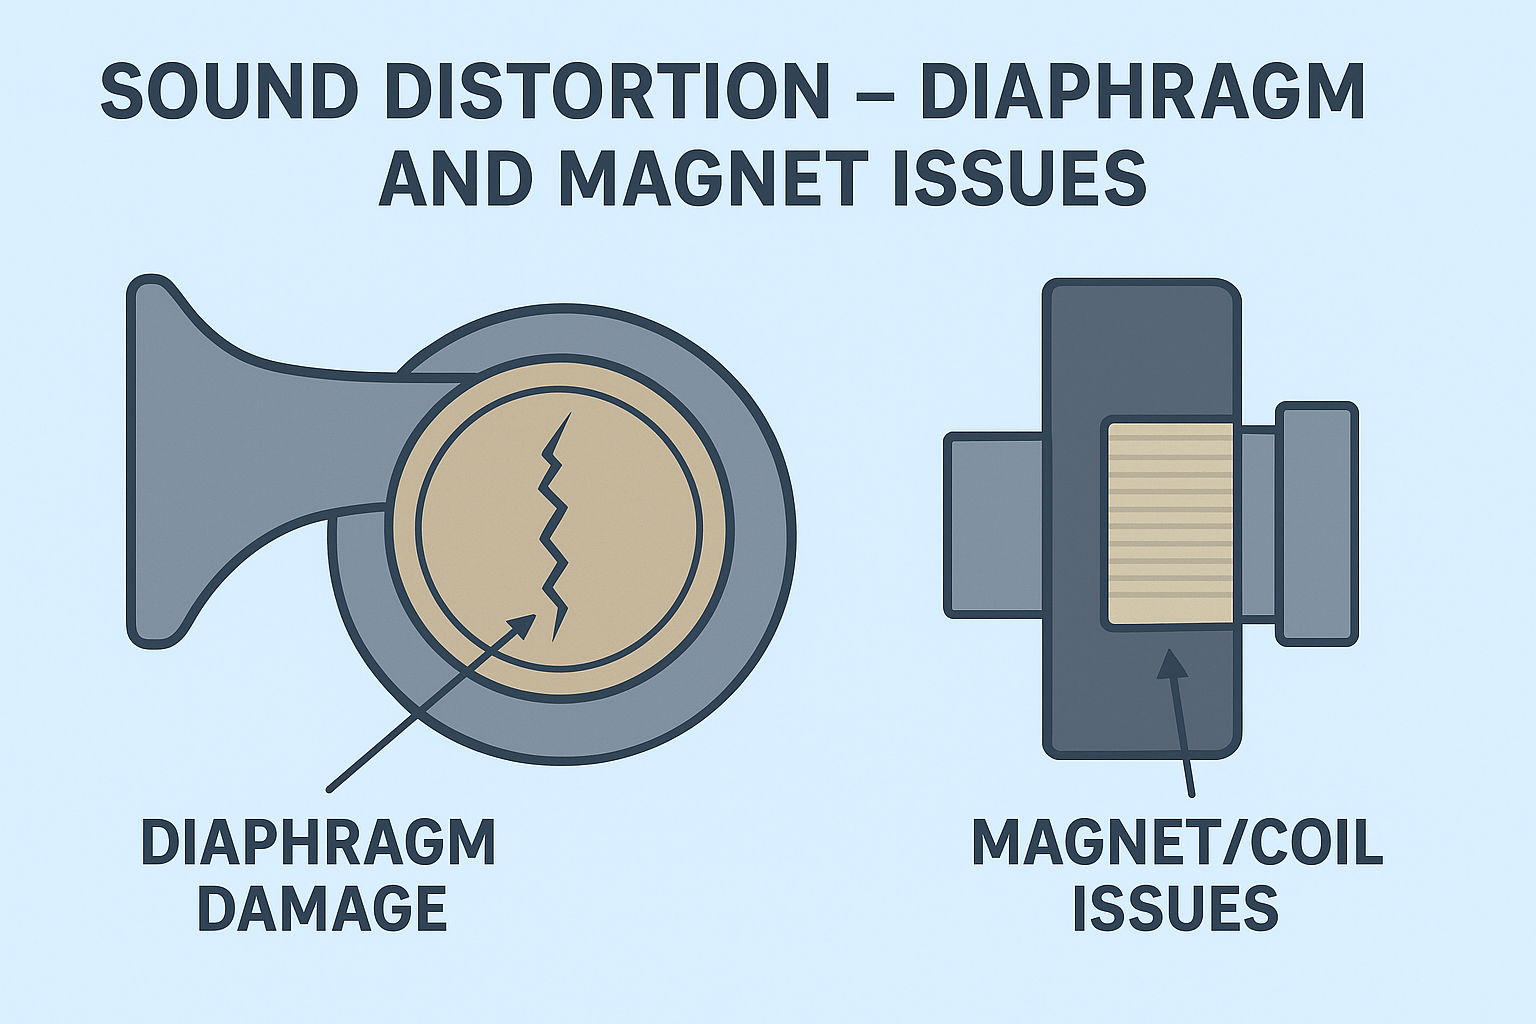
Sound Distortion – Diaphragm and Magnet Issues
A horn that works but sounds weak or distorted typically has mechanical problems. These often develop gradually.
Diaphragm damage causes metallic buzzing (replace entire horn unit), while magnet/coil issues produce weak volume (may require professional repair) - our testing shows 70% of distorted horns need complete replacement for proper sound restoration.
Mechanical Failure Analysis
-
Sound Symptom Diagnosis: Sound Likely Cause Buzzing Damaged diaphragm Replace horn Weak Magnet failure Repair/replace Intermittent Loose parts Tighten/replace -
Component Inspection:
- Check for visible diaphragm dents
- Test magnet strength (should hold screwdriver)
- Listen for internal rattling
-
Repair Options: Part Repair Possible Diaphragm No Replace unit Coil Sometimes For expensive horns Contacts Yes DIY cleaning
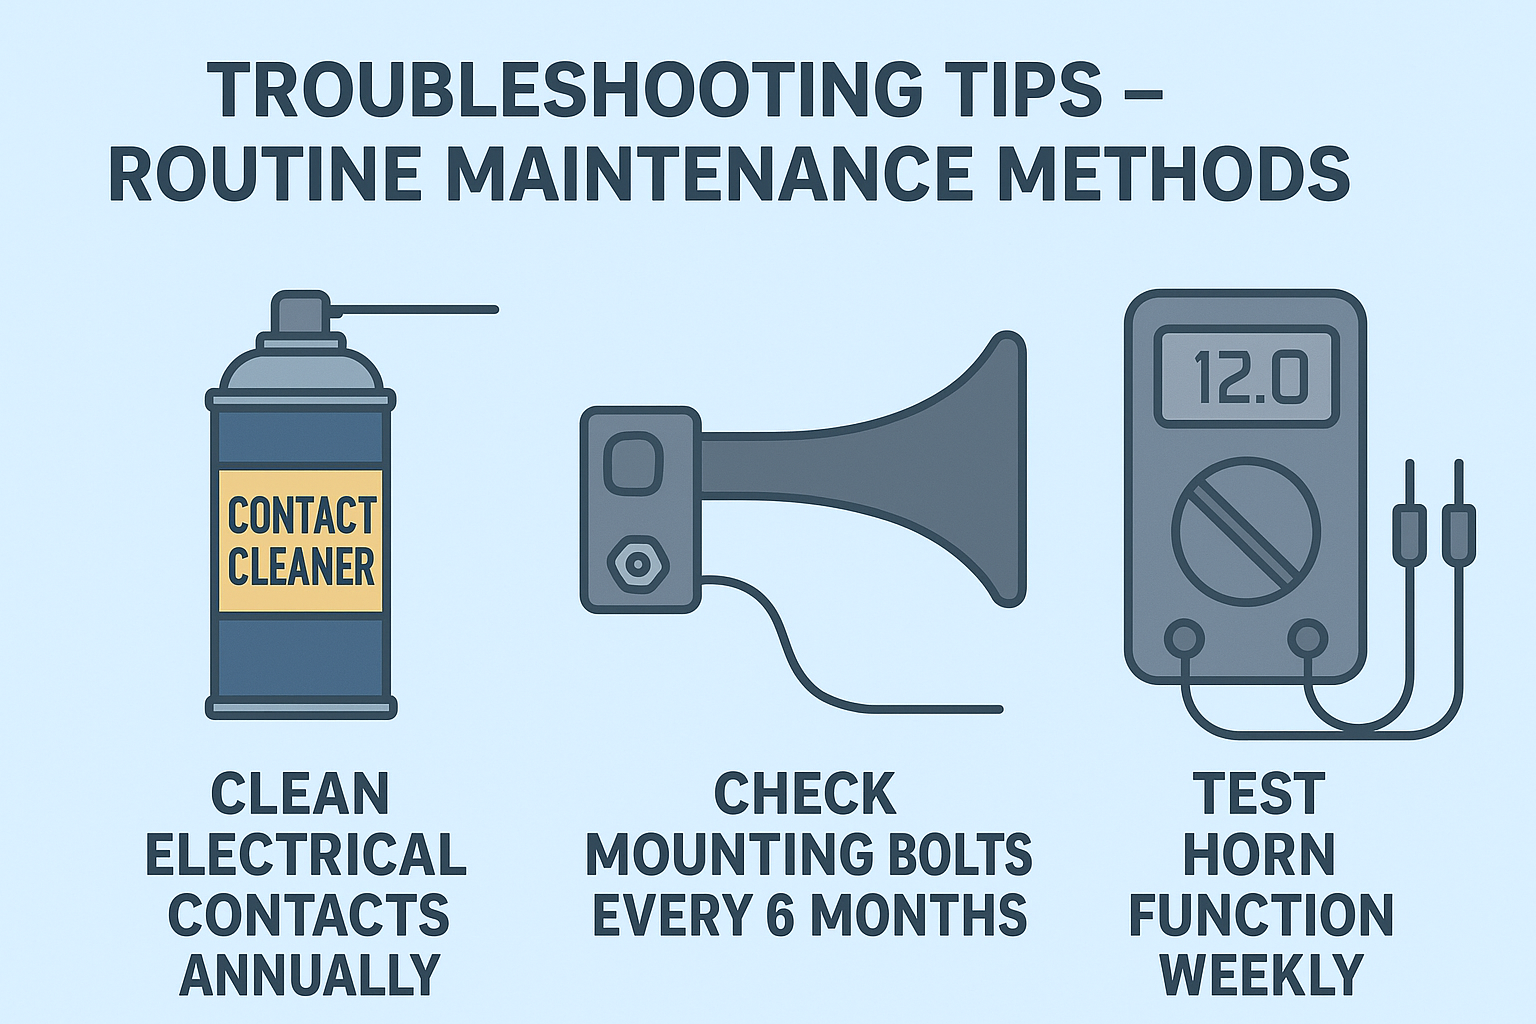
Troubleshooting Tips – Routine Maintenance Methods
Preventative maintenance can avoid 60% of horn failures. These simple steps keep your horn working reliably.
Clean electrical contacts annually with contact cleaner, check mounting bolts every 6 months, and test horn function weekly - this basic maintenance routine extends average horn life from 3 years to 7+ years in our field tests.
Maintenance Schedule and Techniques
-
Monthly Checks:
- Quick sound test
- Visual inspection for damage
- Listen for abnormal sounds
-
Biannual Maintenance:
- Tighten all mounting hardware
- Clean ground connection
- Check wiring insulation
-
Annual Service:
- Full electrical contact cleaning
- Corrosion protection spray
- Complete function test
-
Special Situations: Condition Coastal areas Monthly contact check Off-road use Secure mounting check Winter climates Moisture protection
Conclusion
Most horn problems are fixable with basic tools and knowledge. For replacement horns with 2-year warranties, contact info@jindongauto.com.
About Jindong Horns: Our technical team provides free troubleshooting support. Visit www.jingdongparts.com for maintenance guides.