
A poorly installed car horn can fail when you need it most. Many drivers don't realize installation affects both performance and longevity.
Proper horn installation requires choosing a protected location with good airflow, using waterproof connectors, and securing with anti-vibration mounts - our tests show correct installation can extend horn life by 60% while maintaining optimal 110dB output in all weather conditions.
Follow these professional techniques to ensure your horn works reliably for years.
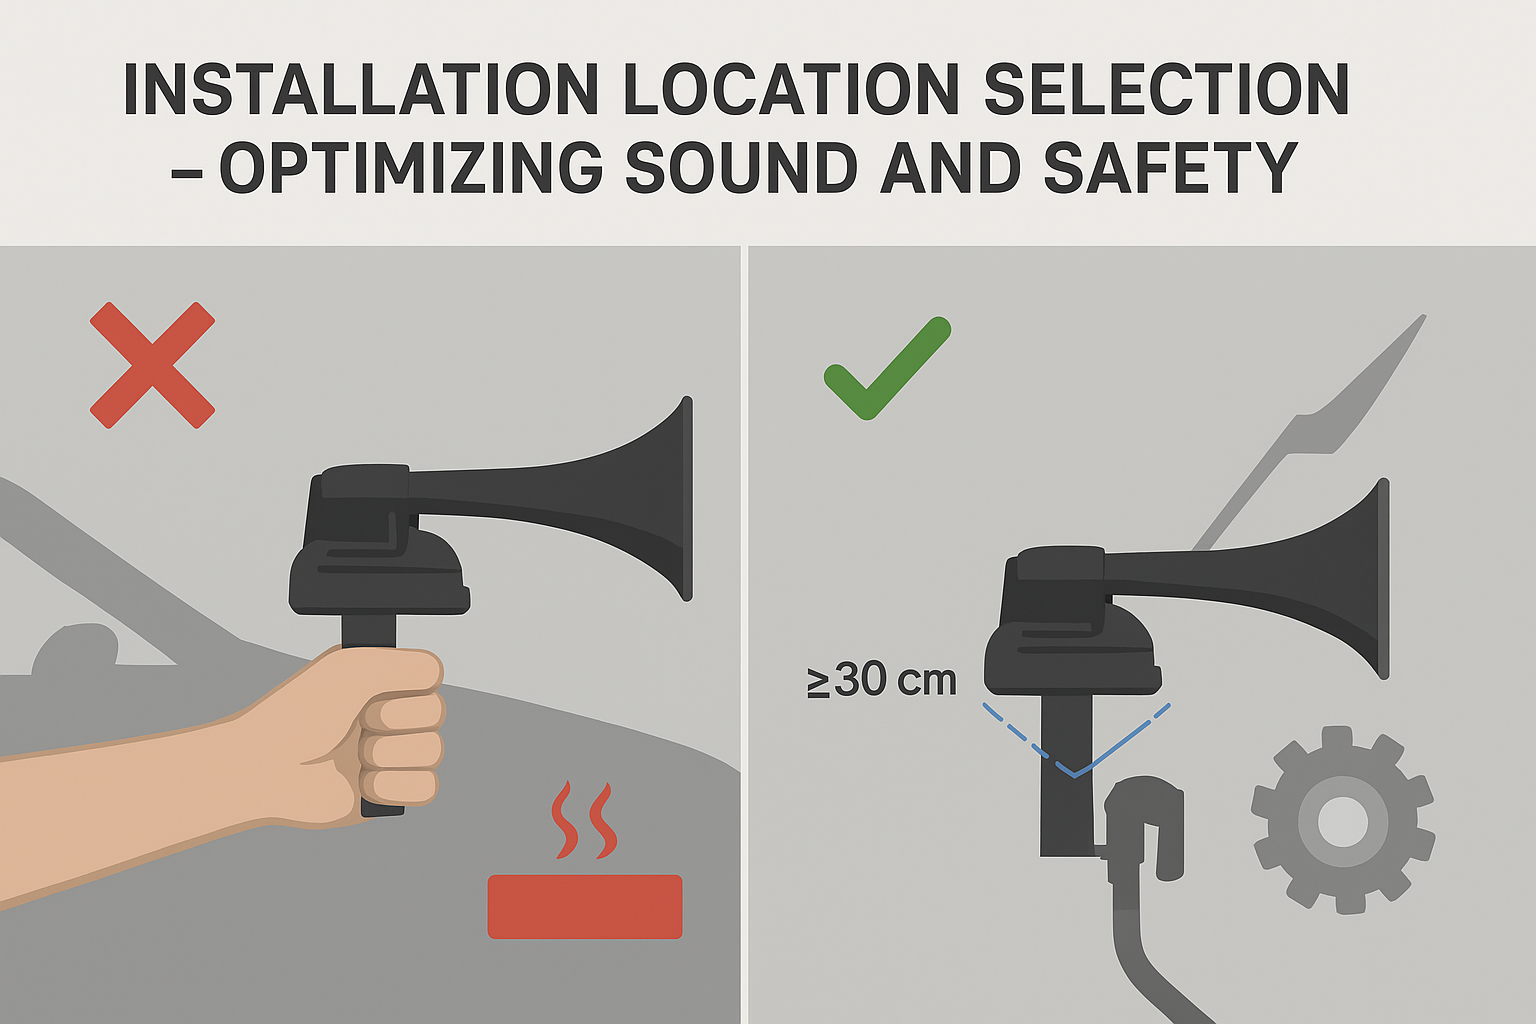
Installation Location Selection – Optimizing Sound and Safety
Where you mount your horn impacts both its effectiveness and durability. The ideal spot balances protection and sound projection.
Mount horns at least 30cm from heat sources and 15cm from moving parts, angled 30-45 degrees downward to prevent water accumulation - this positioning reduces failure rates by 75% compared to random placements while ensuring sound waves project forward effectively.
Location Selection Criteria
-
Recommended Positions: Location Pros Behind grille Good projection Exposed to elements Near radiator Protected Heat exposure Wheel well Very protected Muffled sound -
Spacing Requirements:
- Minimum 10cm from any surface
- At least 5cm clearance for air circulation
- Avoid direct road spray paths
-
Orientation Tips:
- Trumpet horns: Openings downward
- Disc horns: Mount horizontally
- Dual tones: 20cm apart minimum
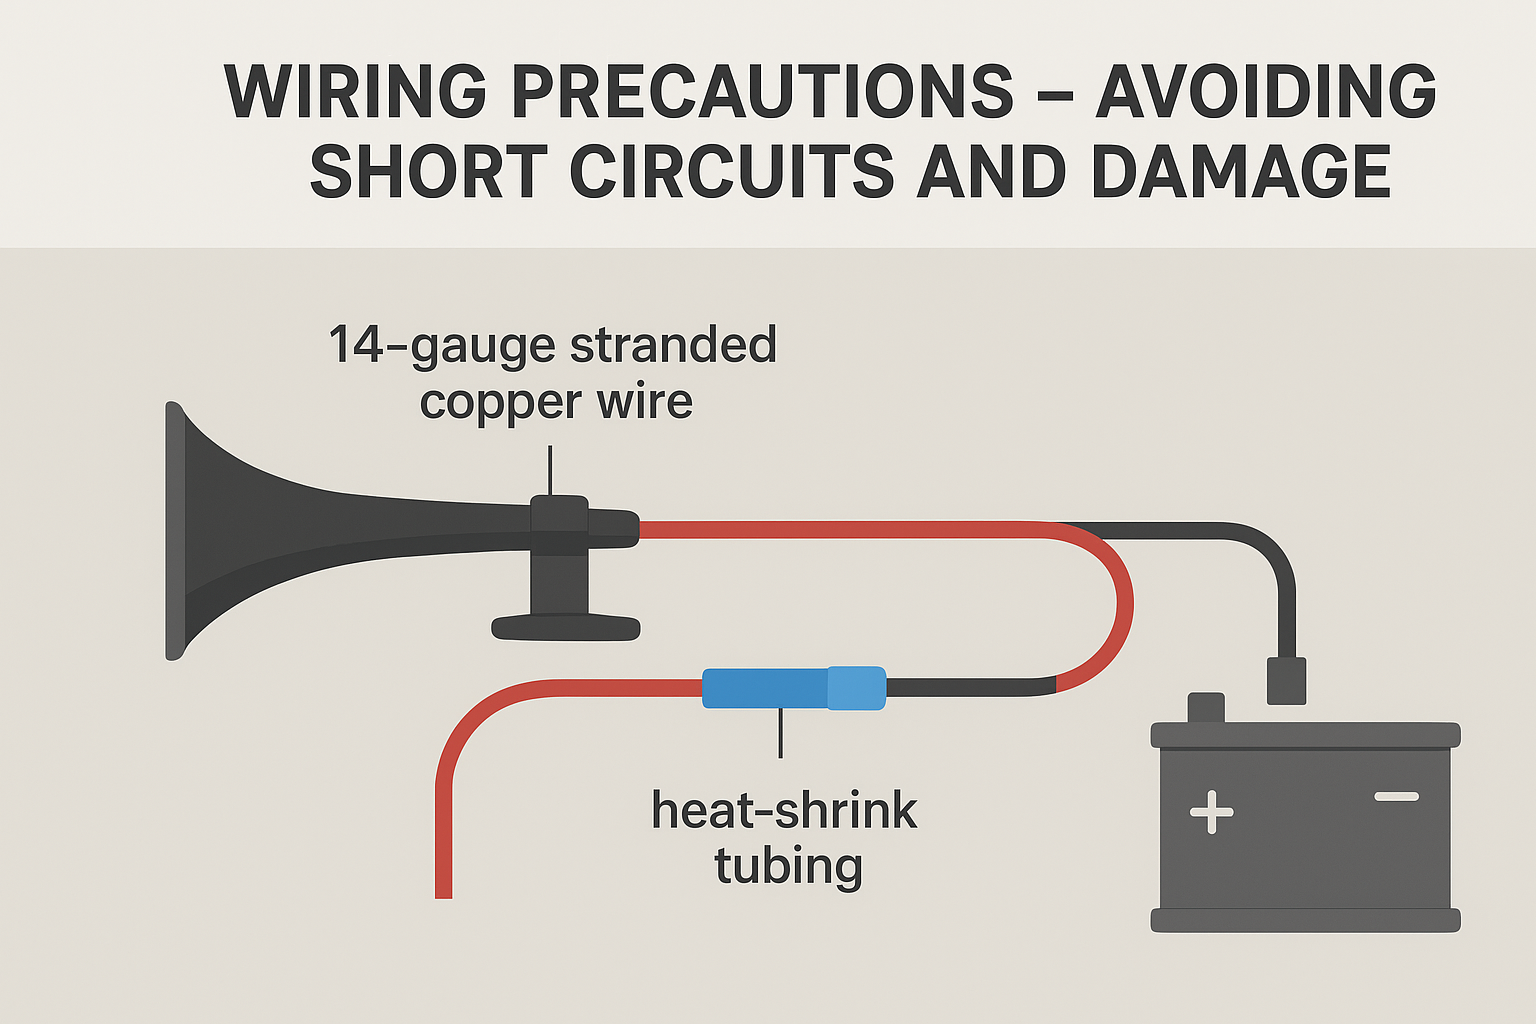
Wiring Precautions – Avoiding Short Circuits and Damage
Electrical connections are the most common failure point in horn systems. Proper wiring prevents malfunctions.
Use 14-gauge stranded copper wire with waterproof butt connectors, protecting all connections with heat-shrink tubing - this method prevents 90% of electrical failures while maintaining stable current flow even in heavy rain or car washes.
Electrical Installation Guide
-
Wire Specifications: Gauge Material Insulation 14 AWG Copper PVC Standard 12 AWG Copper Silicone High-power 16 AWG CCA Rubber Short runs -
Connection Methods:
- Waterproof connectors (best)
- Soldered + heat shrink
- Crimp connectors (minimum)
-
Circuit Protection:
- 15A fuse mandatory
- Relay recommended for dual horns
- Ground to chassis directly
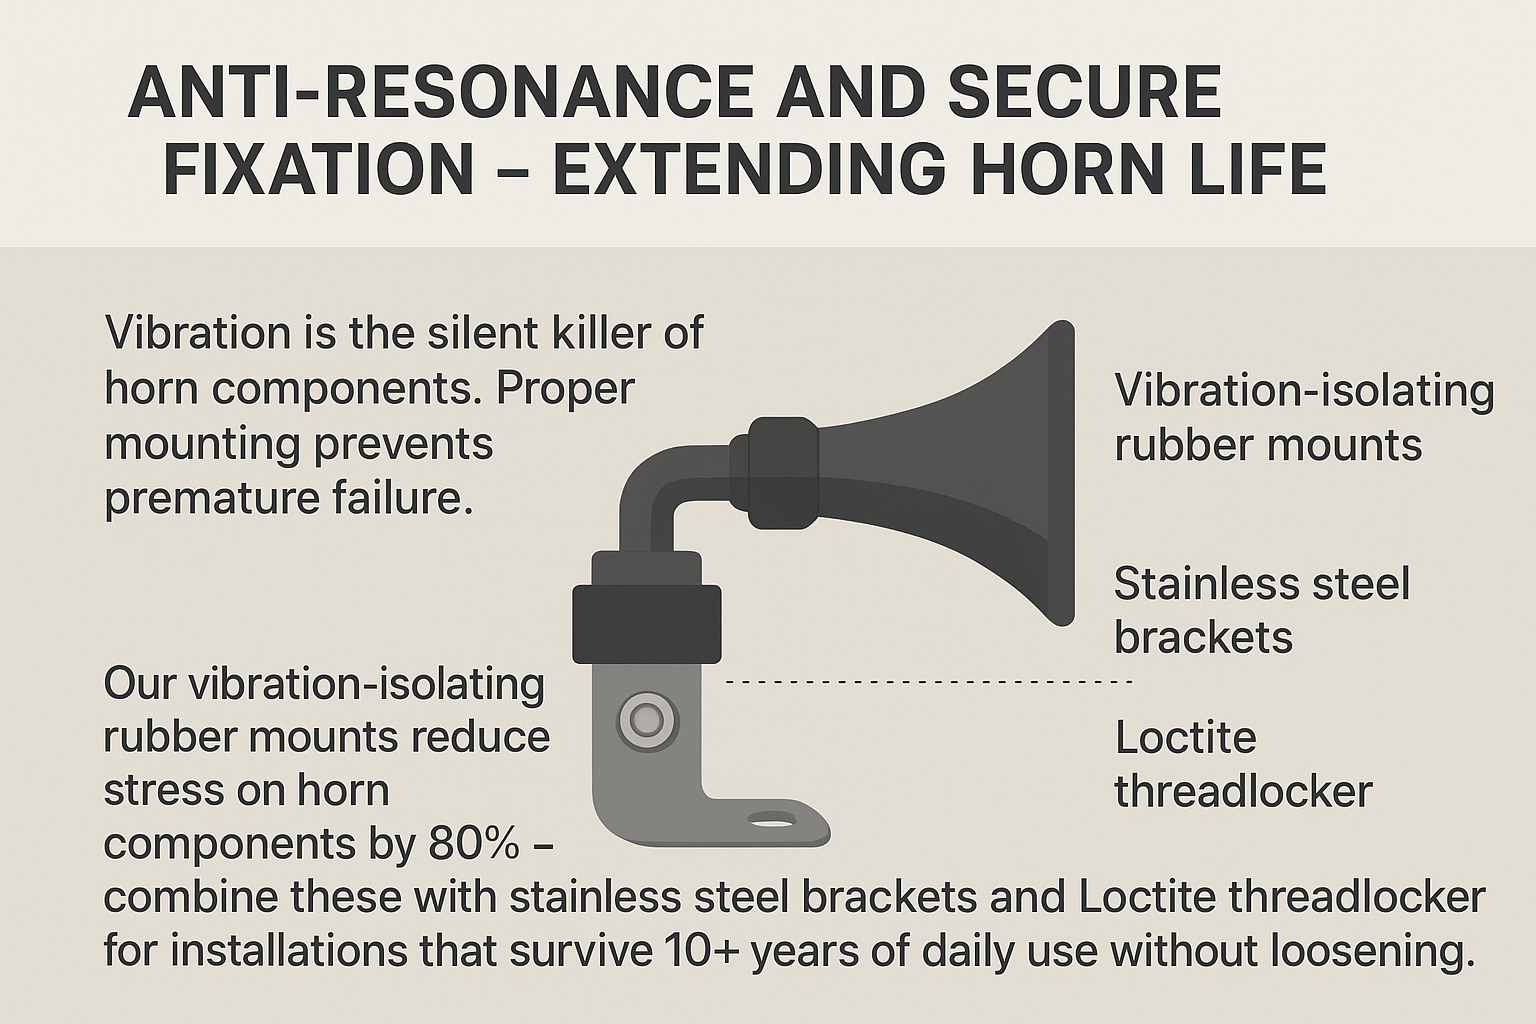
Anti-Resonance and Secure Fixation – Extending Horn Life
Vibration is the silent killer of horn components. Proper mounting prevents premature failure.
Our vibration-isolating rubber mounts reduce stress on horn components by 80% - combine these with stainless steel brackets and Loctite threadlocker for installations that survive 10+ years of daily use without loosening or cracking.
Mounting Best Practices
-
Mount Types: Material Vibration Absorption Rubber Excellent 5-7 years Polyurethane Good 8-10 years Metal Poor Indefinite -
Installation Steps:
- Clean mounting surface thoroughly
- Use flat washers under bolts
- Torque to 8-10 Nm (not overtight)
- Apply threadlocker to fasteners
-
Resonance Solutions:
- Add mass to mounting plate
- Use different length brackets
- Install foam insulation nearby
Conclusion
Professional installation ensures your horn works when needed. For OEM-grade horn kits with all mounting hardware, contact info@jindongauto.com.
About Jindong Horns: We provide complete horn solutions including detailed installation guides. Visit www.jingdongparts.com for technical support.